The Prim Reaper @Laeserin - 12d
Okay. I can't even describe how good these are, so I'm just not even going to try, but OMG. https://i.nostr.build/0jK06.jpg #breadstr #foodstr
c1f8e - 13d
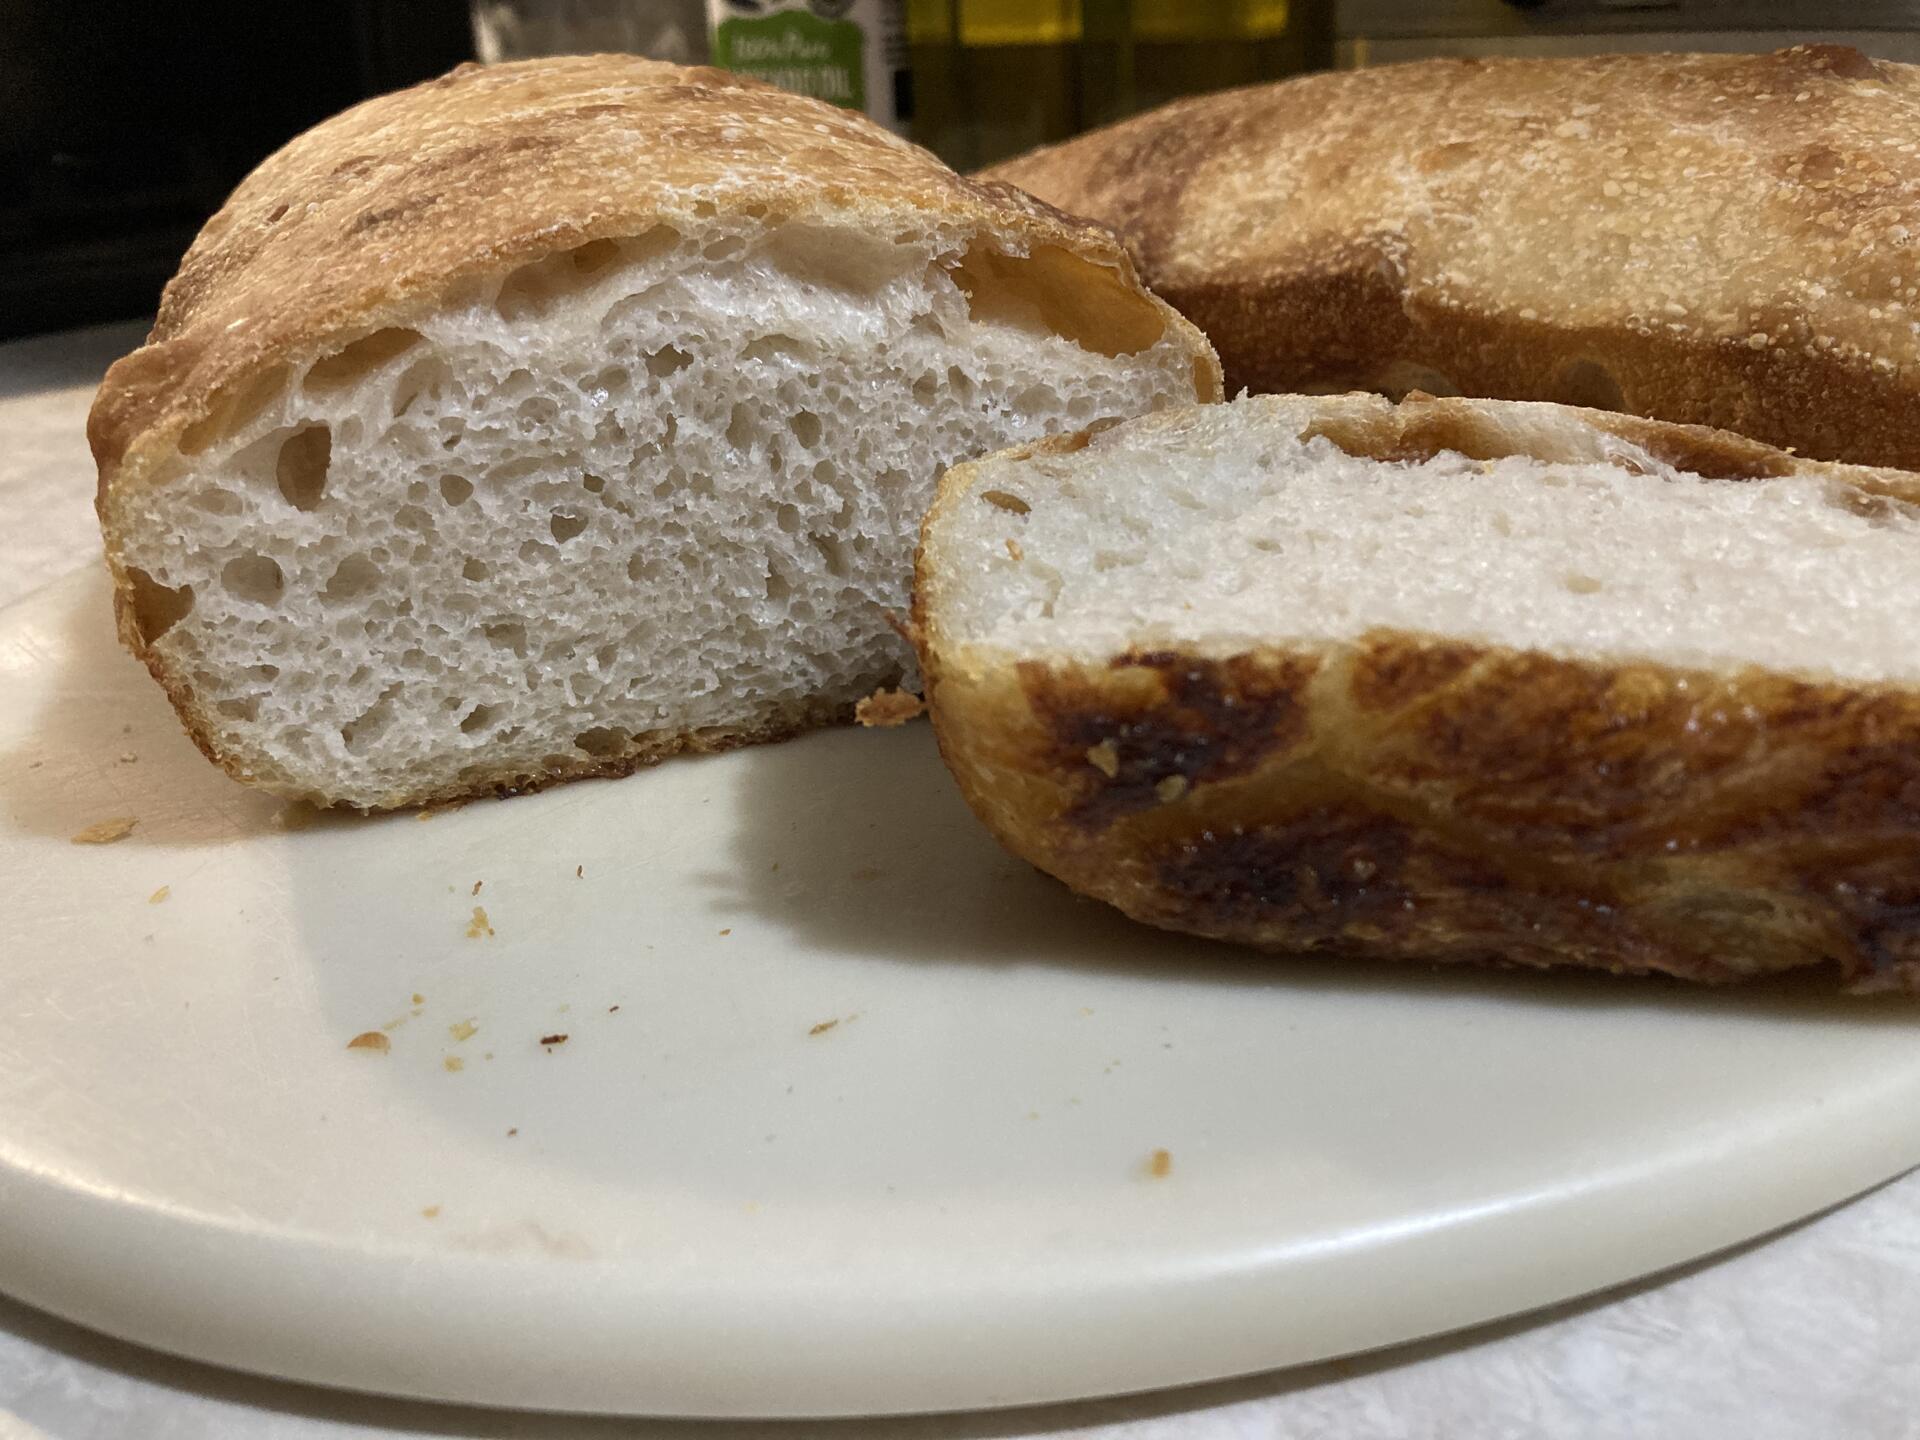
First sandwich #sourdough loaf! Tastes amazing, pretty proud. #breadstr https://image.nostr.build/4223e2a842c8b80e2809bd99afcd8762743b25179e010b73a4202acc29b5534c.jpg
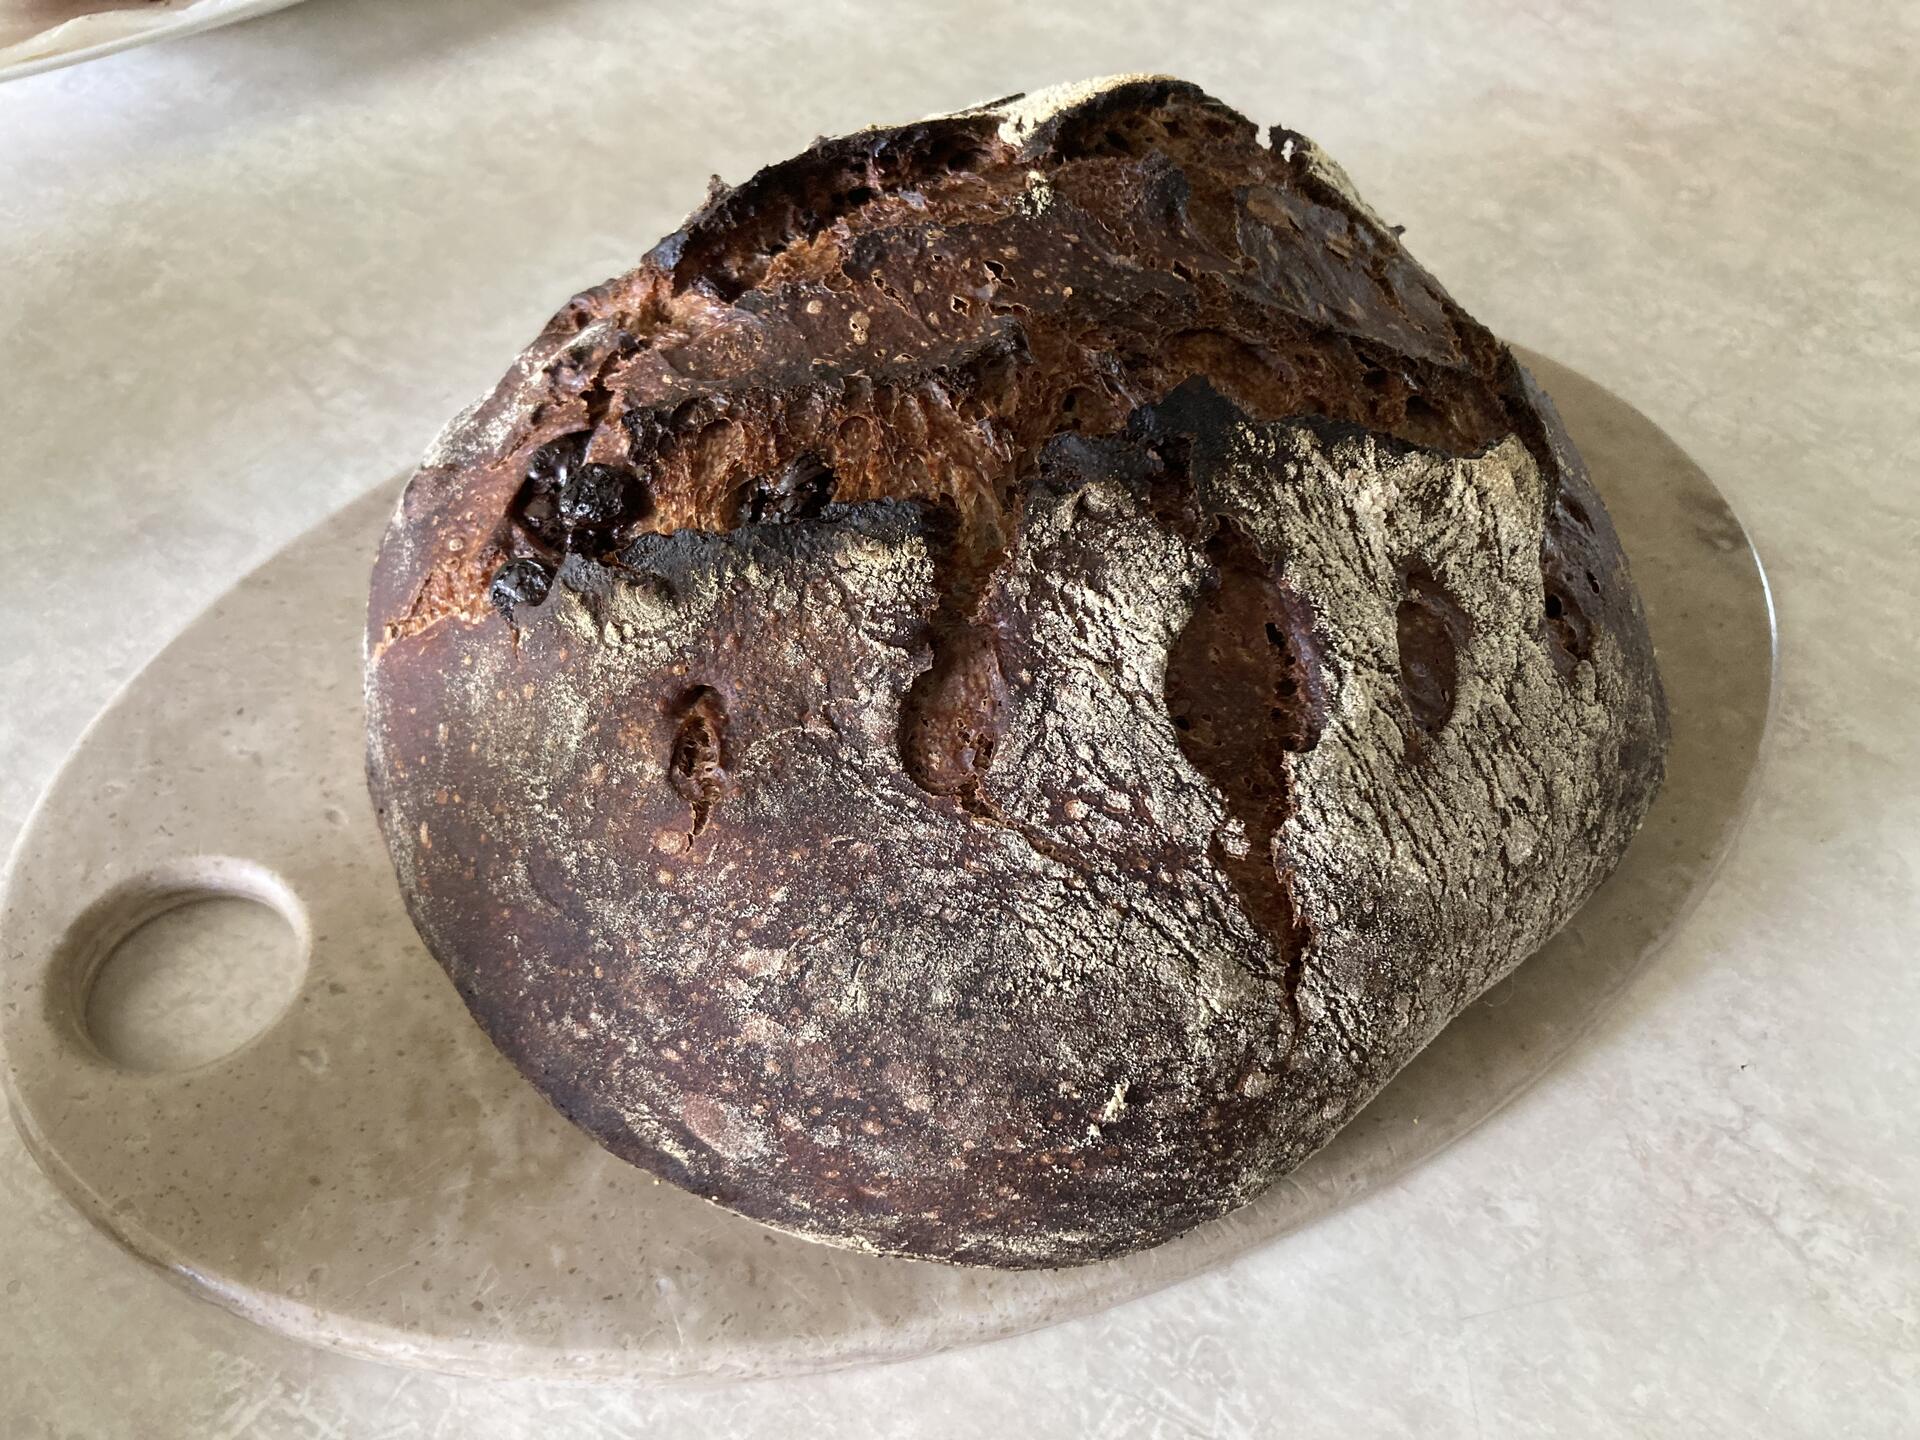
Kept seeing this chocolate sourdough around and wanted to try it. A little dark and a lot of work, but hopefully worth it. Learn more every time! #sourdough #breadstr https://image.nostr.build/2aaaf159d2d9ee3d3684cab975d3f777250cf9274a7ce8cefeb33c59d6c7bf2c.jpg
Kamo Weasel ⭐⭐⭐ @Kamo Weasel ⭐⭐⭐ - 2mo
#catstr #breadstr 😸🐾🍞
mrecheese 🧀 @mrecheese 🧀 - 4mo
And this is a bread lame. For cutting the cool slits in the bread before you bake it. Who knew? #breadstr https://www.printables.com/model/184333-lame-for-bread
I'm about to find out what the hell a bread lame does. Printing one for nostr:npub1hgvtv4zn2l8l3ef34n87r4sf5s00xq3lhgr3mvwt7kn8gjxpjprqc89jnv now. I waited until AFTER she made bread, so now she has to make MORE bread. #breadstr
Jay @Jay - 4mo
#breadstr buds 🍞🤝🍞
f4d89 - 6mo
My wife made some sourdough. I'm trying to convince her to get on NOSTR so I said Me: You should note that to #breadstr on #nostr My 6 YO: dad, do you mean #TheNostr 🤣, he's ready
Studio 3.14 Official @Studio314Official - 8mo
This looks awesome! Nice crumb on the inside too #breadstr nostr:nevent1qqsz4j5clhx6dnycx3msv0ff5qltwzl663fjmfln25g9txxp96x995spz3mhxue69uhhyetvv9ujuerpd46hxtnfduqs6amnwvaz7tmwdaejumr0dsmp38hu
chef4₿rains @chef4brains - 10mo
PRESERVED LEMONS A couple weeks back I posted a photo of our lemon tree going berserk. It is the season for it here in #AUStrich land. nostr:npub1pk37s3t84s087s246juhnfnwynv8g2jc8emsdkt2fk42xa7v0tdq5mgwnd asked for any recipes that would help use any excess lemons so here we go. For centuries food has been getting preserved (old school #hodl) and one of the most common ways to do it it to use salt, probably because once upon a time salt was a form of money. Preserved lemons are really popular in Northern African (particularly Morocco), Persian and Indian cuisine, eventually finding their way into European food. Since this is such a simple recipe, I like to really focus on the two key ingredients, lemons and salt. My lemons are home grown and I make sure the salt is quality. I am lucky enough to live where there is a massive salt lake (Lake Deborah) in the middle of the dessert. #AUStriches if you can, search this out. The salt, when ready after being baked by the sun, is literally scooped up and shipped to its processing plant, washed and then dried in the kiln. That is it. I know this to be true because I have been to the plant and verified it. It is as salty as salt gets and 100% natural. The same can’t be said for brands like Morton and Saxa, the cunts add fluoride and iodine! You will need a good solid glass jar that can withstand heat and seals well. Moccona coffee jars are great as are mason jars. Ikea make a jar called the ‘korken’. To prep your jar you will want to sanitise it and the easiest way to do that is bang it in an oven preheated to 150C for about 10-15 mins. Happy preserving and #enjoy! #proofofwork: 45 minutes prep time and 30 days to cure the lemons. Ingredients: 10 ea Lemons, washed and topped 1 cup Salt 2 ea Cinnamon sticks, toasted 6 ea Cloves, toasted 10 ea Coriander seeds, toasted 6 ea Black pepper corns, toasted 2 ea Bay leaves, fresh if possible 5 sprigs Thyme, fresh Method: -In a large pot, boil some water and blanch the lemons for 2-3 minutes and cool in an ice bath. This softens the skin slightly and opens it up to help the curing. -Quarter the lemons from the top to within 3 cm of the bottom, sprinkle salt on the exposed flesh, then reshape the fruit. Place 1 tablespoon salt on the bottom of the sanitised mason jar. -Layer in the lemons and push them down, adding salt and the spices between layers. Press the lemons down to release their juices and to make room for the remaining lemons. If the juice released from the squashed fruit does not cover them, add freshly squeezed lemon juice — not chemically produced lemon juice and not water. Leave some air space before sealing the jar. -Let the lemons ripen in a warm place, shaking the jar each day to distribute the salt and juice. Let ripen for 30 days. -To use, rinse the lemons, as needed, under running water, removing and discarding the pulp. There is no need to refrigerate after opening. Preserved lemons will keep up to a year, and the pickling juice can be used two or three times over the course of a year. Chef tip: change up the spices and herbs to get a different flavour profile. Use hearty herbs or the stalks of soft herbs. Chillies are a great addition too! #chefstr #foodstr #breadstr #yumstr #homemade #eatrealfood #noshtr #nostr #grownostr
ralf @ralf - 11mo
#breadstr #plebchain https://nostr.build/i/4d56a9fc2764e9a5fb8745eb6934ee52d5ab5c22f67e97c52be2e2a31f5679ad.jpg
chef4₿rains @chef4brains - 11mo
BANANA BREAD I love bananas but they can be fickle and black turn quickly especially in hotter climates. When they do we bang them in the freezer until there is enough to whip up a batch of bread. When making this recipe we usually double it and bake in 2 nonstick, 1 kg (2lb) loaf tins (300mm L x 78 mm H x 110 mm W) but this recipe is written for ONE loaf. This is a super easy recipe to make and doesn’t really require much baking skill, it does help if you have a mixer. A KitchenAid is worth the #sats. #chefstr tip: Whip some butter with a little cinnamon, honey and fresh vanilla bean. Essence is fine if you can’t find vanilla bean. There are chocolate chips added to this recipe but it can be easily taken out. #proofofwork: 20 minutes prep and approximately 60 minutes cook time Yield: 1 x 1kg loaf Ingredients: 250 gr Self raising flour 250 gr Castor sugar 125 gr Unsalted butter 3 ea Large bananas 180 gr Chocolate chips 2 ea Eggs large (55g) Method: Preheat the oven to 170C. Mash the banana. In a mixer, add the room temperature/softened butter and sugar. Cream them together (whip on a high speed) until the mix is pale and fluffy. With the mixer still running, add in the eggs one by one and when incorporated, add the mash bananas. Turn the mixer off and fold in flour with a spatula. You can use the mixer but be careful as you don’t want to over work the flour which will activate the gluten, making the loaf dense and heavy. Fold in the choc chips. You can also add vanilla essence (3ml) and cinnamon (5gr) if you want. Place the batter in the loaf tin and cook in the 170C preheated oven for about 1 hour. Test the loaf with a bamboo skewer. Insert the skewer to the middle of the loaf, it should come out clean when the loaf is ready. Allow to cool as it slices better when cold. Smother with butter and #enjoy! #chefstr #foodstr #breadstr #yumstr #homemade #eatrealfood #noshtr #nostr
631d4 - 1y
Parmesan olive sourdough from New World Sourdough by Bryan Ford #breadstr https://nostr.build/i/nostr.build_a805fe907b501932626d59d03f7b5782bb09a9bd93aff9b1e6991e93151347e5.jpeg